· 3 min read
Windows Terminal Profile for O365 CLI
Using the Office 365 CLI, you can manage your Microsoft Office 365 tenant and SharePoint Framework projects on any platform. And I must admit I like the tool to manage my Office 365 dev tenant. But I am still on windows, so when I recently formatted my laptop I reconsidered installing the CLI again.
Using O365 CLI
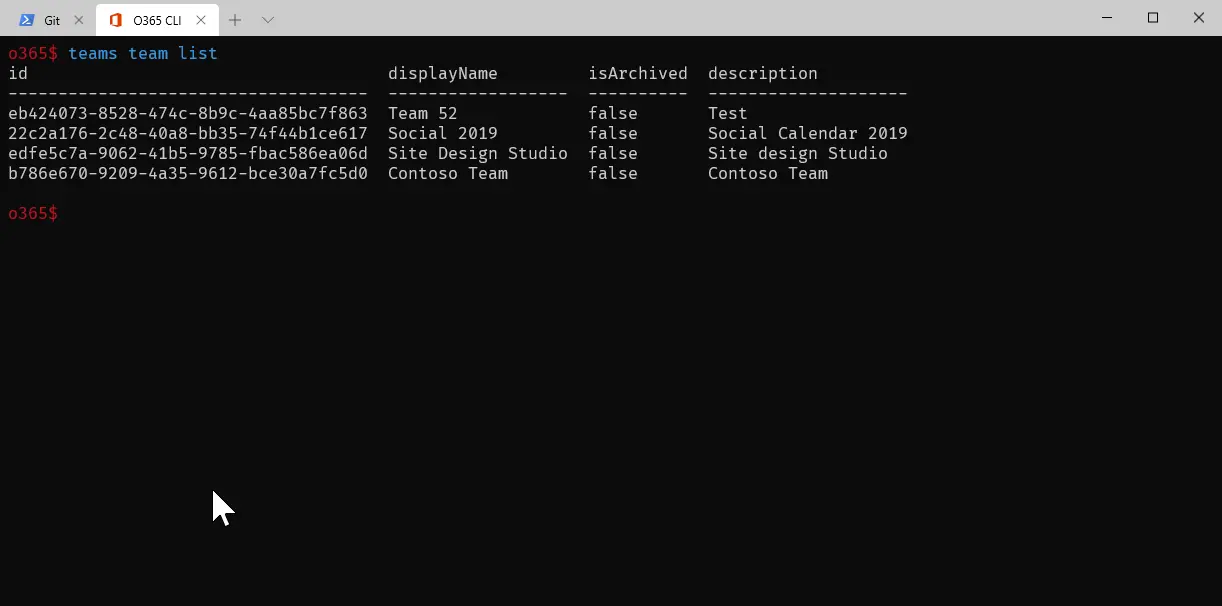
I use the O365 CLI mainly for managing my dev tenant. In addition to that, it also is used in some of my build pipelines. I assume that is how most people are using it. The main commands I use are for cleaning up some of the things I do on my tenant. As well as reading and settings certain settings for demos. I even have some scripts that prep some of the demos I do during events.
Windows Terminal
And as a Geek I do want to play around with new stuff. So I installed the Windows Terminal. I love the concept of an integrated terminal, and it looks beautiful. The fact that you can work with tabs to fire up new instances is something I loved since I used cmder. Now with the Windows Terminal that has become even easier. And with some additional settings described by Scott Hanselman in how to make a pretty prompt in Windows Terminal, you can make it look awesome.
Windows Terminal Profiles
As described in the post by Scott you can create profiles and apply certain settings. I agree with most of the points in his post except that I use a different font. I use the Fire Code font in both Visual Studio Code as well as all my terminals. This provides consistency, something I like, and provides support for programming ligatures.
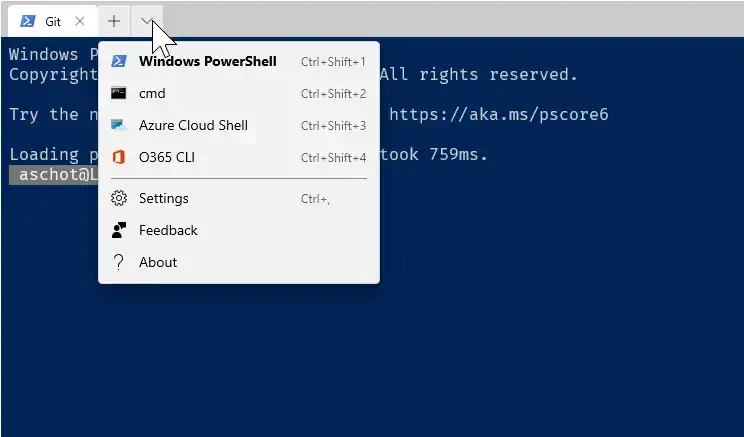
Creating an O365 CLI profile
So with all the goodness of the O365 CLI and the option to create custom profiles. It was as easy as one and one equals two. I have created a profile for the O365 CLI. So from the Windows Terminal, I can easily open the O365 CLI and start right away and connected. All you need is some configuration for your profile:
{
 "guid": "{b453ae62-4e3d-5e58-b989-0a998ec441b9}",
 "hidden": false,
 "name": "O365 CLI",
 "fontFace" : "Fira Code",
 "commandline": "powershell.exe o365",
 "icon": "https://blobs.officehome.msocdn.com/images/content/images/favicon_metro-bb8cb440e5.ico"
}
In a new profile an icon does provide some clarity thus that should be provided as well, but is not mandatory. Besides that it is a matter of spinning up your powershell exe and providing the O365 cli command.
As profiles come with shortcuts you can easily open your favorite profile or even configure it to open automatically. To run the O365 CLI it is al rather easy. Just provide the console you want to run it in, and provide the O365 CLI command. Besides those settings, I did not change anything in the color scheme or with any of the other properties except the font. As there are a few samples on the Azure Cloud Shell you can probably find some nice settings to tweak to your liking as well!

Albert-Jan Schot
CTO, Microsoft MVP & FastTrack Recognized Solution Architect
I am Albert-Jan Schot, CTO at Blis Digital, Microsoft MVP, and FastTrack Recognized Solution Architect focused on Microsoft 365, Azure, and AI agents. I help teams turn complex Microsoft Cloud challenges into practical architecture decisions and shipped outcomes.
Zuid Holland, Netherlands